
How Are Braces Removed? The Real Debonding Appointment Explained (2026 Guide)
Quick Answer
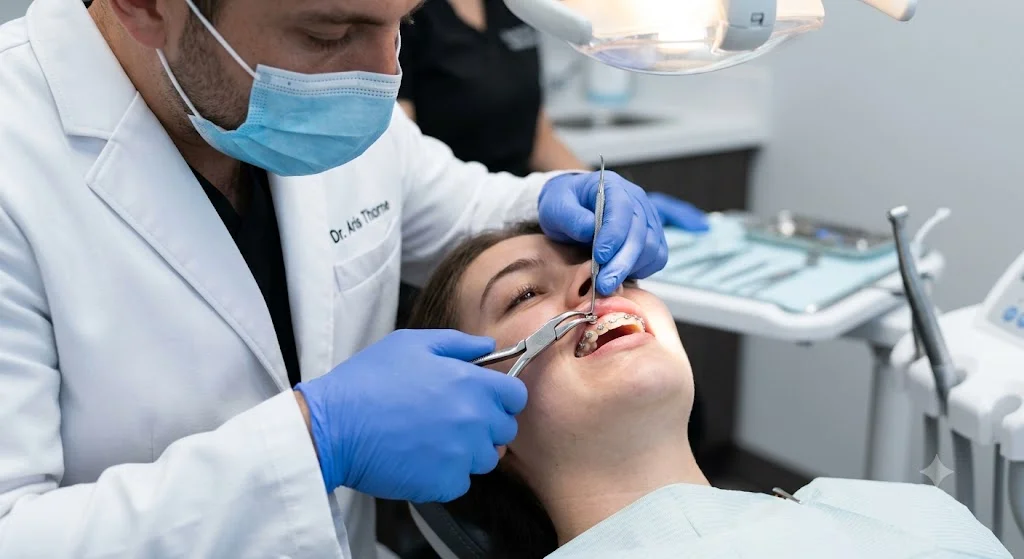
Braces are removed in a 60 to 90 minute debonding appointment. A debonding plier cracks the adhesive at the bracket-enamel interface — no anesthetic required. Most patients feel pressure and snapping but no sharp pain. Adhesive residue removal takes most of the appointment. The retainer scan or impression happens the same day.
Part of our Complete Braces Timeline & Process Guide.
You have waited 18 months for this appointment. You sit in the chair expecting the orthodontist to simply pull the brackets off your teeth. What actually happens is nothing like that — and understanding the mechanics of debonding explains why your teeth look slightly different for a few weeks after removal, why white spots sometimes appear that were invisible the whole time you had braces, and why you leave the office with a retainer the same day instead of coming back for one later.
This is the appointment that rarely gets explained. Here is exactly what happens.
How Long Does It Take to Remove Braces?
The debonding appointment runs 45 to 75 minutes for a full set of upper and lower braces. Most patients assume removal will be fast — but the bracket removal itself is the quickest part. The majority of the time is spent on the step nobody warns you about: removing the adhesive residue left on every tooth after the brackets come off.
Step-by-Step: How Braces Are Actually Removed
Step 1: Ligature and Wire Removal
The appointment starts just like every adjustment — elastic ligatures are cut and removed, and the archwires come out of the bracket slots. This part takes a few minutes and feels identical to a normal tightening visit.
Step 2: Bracket Removal — Not What You Expect
This is where most patients expect something dramatic and find the reality surprisingly anticlimactic.
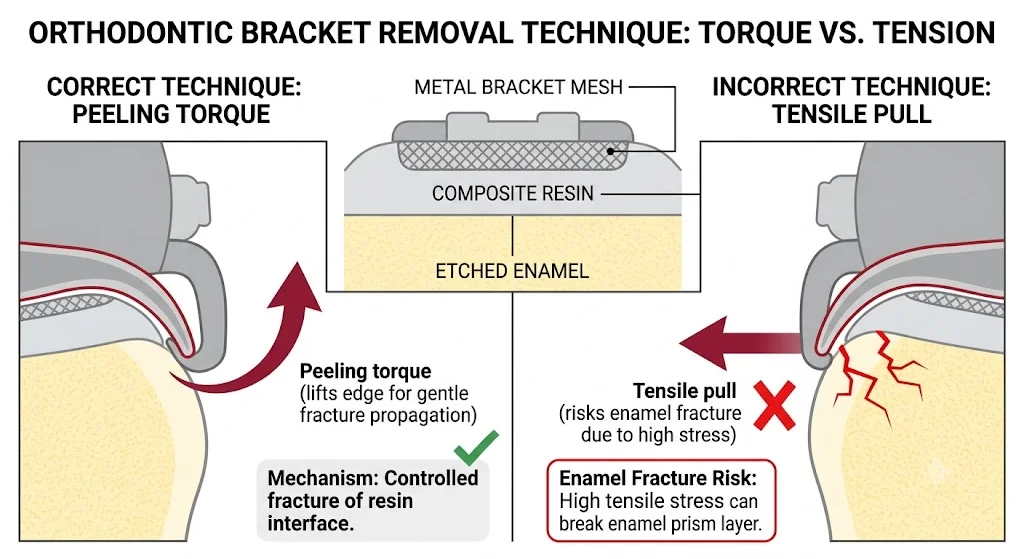
Your orthodontist uses a bracket-removing plier — a specialized instrument with a curved beak that hooks onto the gingival (bottom) edge of each bracket. The plier is not used to pull the bracket straight off the tooth. Instead, the handle is squeezed and the beak applies a controlled peeling torque — a rotational force that works from the base upward.
When your brackets were bonded, composite resin cured against two surfaces — the etched enamel and the metal mesh pad on the back of the bracket. By design, the resin-to-enamel bond is the weakest interface in this sandwich. When the plier applies peeling torque correctly, the adhesive fractures at the enamel-resin interface — the bracket and its bonded resin come away together, leaving enamel undamaged.
This is what a properly executed debonding feels like: a series of small sharp clicks, one per bracket, with brief pressure but no pain.
The failure mode orthodontists are actively avoiding is pulling a bracket straight outward. A direct outward pull creates tensile stress that can peel enamel along with the bracket — taking a micro-chip of tooth surface with it. This is extremely rare in clinical practice but explains why the technique uses torque rather than tension.
Step 3: Adhesive Flash Removal — The Part That Takes the Longest
After every bracket is removed, each tooth has a small patch of residual composite resin left on its surface — called adhesive flash or resin tags. These patches are visible as slight irregularities on the tooth surface and feel rough to the tongue.
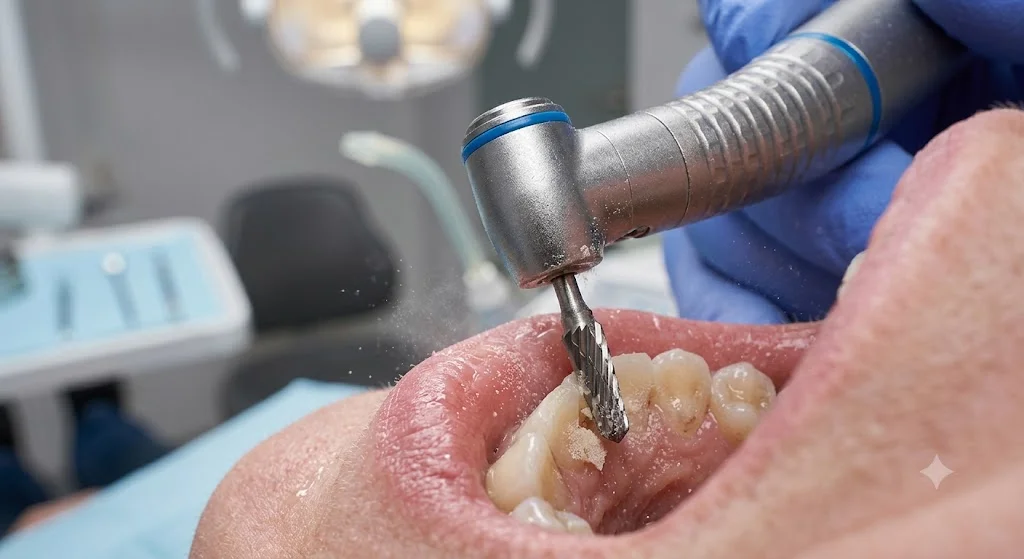
This residue cannot be scraped off with a hand instrument without risking enamel scratching. It is removed using a tungsten carbide finishing bur mounted in a slow-speed handpiece, followed by a fine-grit polishing disc. The orthodontist carefully contours each patch until the tooth surface is flush again.
This step takes longer than the bracket removal itself. If you feel mild sensitivity during debonding, it is almost always here — the rotating bur generates minor heat and vibration on enamel that has not been exposed to saliva or remineralization for months.
Step 4: Polishing
Once all adhesive residue is removed, each tooth is polished with a rubber cup and fine pumice paste. This smooths any microscopic scratches from the bur and restores the enamel luster. This is the step where your teeth start looking like themselves again for the first time in over a year.
Step 5: Retainer Scan or Impression — Why It Happens the Same Day
Most patients are surprised the retainer scan happens immediately after brackets come off, not at a separate appointment.
The reason is specific: teeth begin drifting within hours of debonding. The gingival fibers — collagen fibers embedded in your gums that held your teeth in their pre-braces position for years — have been stretched into a new arrangement by your treatment. The moment the orthodontic appliances are removed, those fibers begin contracting, exerting a slow but immediate rotational and tipping force on every tooth.
A scan taken immediately captures your teeth at peak alignment. Any delay — even coming back the next day — risks capturing a position that has already begun to drift, producing a retainer that does not hold the corrected position precisely.
If your practice uses digital scanning (iTero or similar), you leave the same day with clear thermoplastic retainers fabricated on-site. If traditional impressions are taken, you receive a temporary retainer while the permanent one is fabricated in a lab over 1 to 2 weeks.
The White Spots Nobody Warned You About
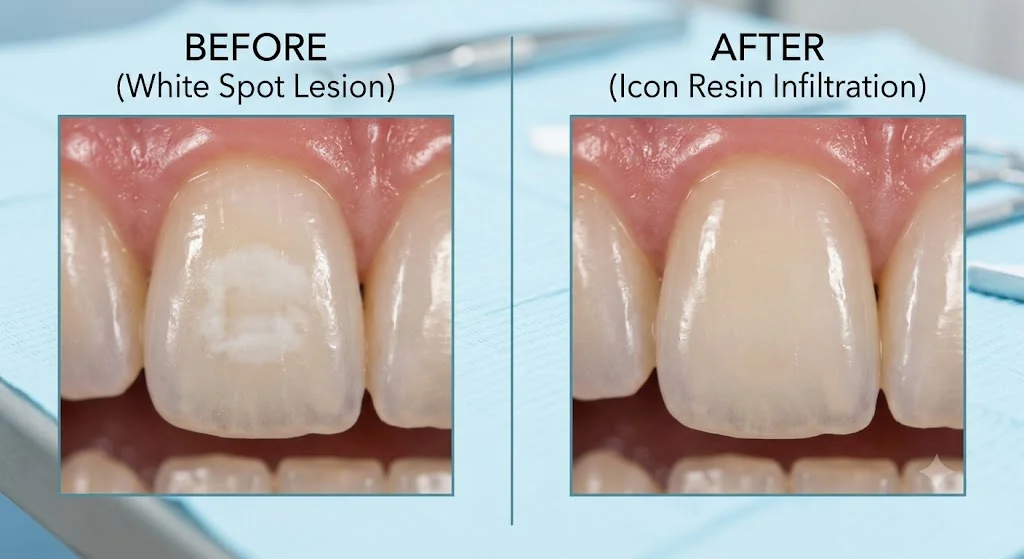
One of the most common post-debonding surprises: white chalky marks ringing the area where each bracket sat. These are called white spot lesions — areas of enamel demineralization caused by acid from bacterial plaque accumulating around bracket bases during treatment.
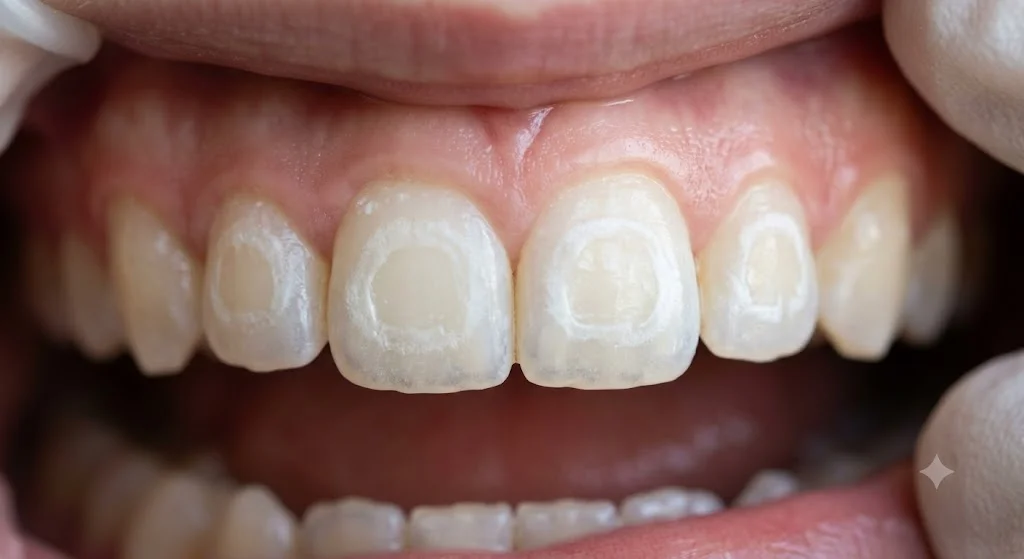
The lesions were always there during treatment but hidden under the bracket footprint. Debonding day is when they become visible for the first time. They are not caused by the debonding process — they are caused by plaque accumulation against the bracket margins over months, a particularly difficult area to clean with a toothbrush regardless of effort.
Applied at the debonding appointment. Promotes remineralization. Mild lesions can partially fill in over several months of fluoride exposure and normal saliva contact.
A mixture of pumice and weak hydrochloric acid applied to the enamel surface removes the outer chalky layer. Effective for superficial lesions without touching deeper structure.
A resin is infiltrated into the porous demineralized enamel, filling the lesion and making it optically match the surrounding tooth. The most complete treatment for moderate to severe lesions — results in a single appointment.
If you see white spots when your braces come off, ask about Icon resin infiltration before pursuing any cosmetic options. Many patients who would otherwise need veneers can resolve white spot lesions with this treatment alone — in a single appointment, without drilling.
Can Another Orthodontist Remove Your Braces?
Yes — any licensed orthodontist can physically remove your braces. There is no technical requirement that the orthodontist who bonded them must remove them.
In practice, the complications are clinical, not legal. A receiving orthodontist needs your full records — initial photographs, X-rays, treatment models, and notes. Without these, they cannot determine whether treatment is actually complete, whether current tooth positions match the intended outcome, or whether over-correction finishing work was planned but not yet done.
If you need to transfer mid-treatment:
Contact your current orthodontist for a records packet before you move. They are legally obligated to provide copies upon request — you may be charged a records duplication fee (typically $25–$75), but they cannot withhold records or refuse removal. Contact orthodontists in your new location before the move to confirm they accept transfer cases. Most do.
Should You Try to Remove Braces at Home?
No — and the reason is not simply “see a professional.” It is mechanical.
The composite residue left after bracket removal requires rotary instruments to remove cleanly. If you crack a bracket off at home with pliers, you leave a jagged patch of cured adhesive on the enamel surface that cannot be removed with household tools without scratching enamel permanently. The bracket removal itself — done without proper torque control — risks micro-fracturing the enamel layer, leaving permanent surface irregularities. Bracket shards being swallowed or cutting gum tissue is also a real risk.
The bracket removal takes 15 minutes in a clinical setting with the correct instrument. It is not the step worth attempting to skip.
What Your Teeth Look Like After — And Why They Change
Most patients are slightly surprised by their teeth immediately post-debonding. A few things happen at once that cause a temporary appearance which settles over the following weeks.
Gingival margin repositioning: Your gum tissue was compressed slightly by the bracket bases for the duration of treatment. In the days after debonding, the gingival margin reshapes as compression is removed. Teeth can look slightly longer immediately after, then normalize.
The settling drift: In the first two to four weeks after braces come off, teeth shift very slightly as gingival collagen fibers redistribute tension. This is normal and expected — it is why retainer compliance is most critical during this window. Patients who wear their retainer inconsistently in the first three months account for the majority of early relapse cases.
Summary
Removing braces is a 45 to 75 minute appointment where brackets are torqued off with a specialized plier (not pulled), adhesive flash is removed tooth-by-tooth with a tungsten carbide bur, and a retainer scan is taken immediately because teeth begin drifting within hours of debonding. White spot lesions become visible for the first time at this appointment — they were present the whole time, hidden under bracket footprints. Any orthodontist can remove braces, but the receiving provider needs your full records to confirm treatment is complete before doing so.
Wondering how long until you reach this appointment?
Use Our Free Timeline Estimator →Not sure what happens after the braces come off? Read our Life After Braces & Retainers Guide — including how long to wear your retainer and what happens if you stop.
Want to understand what led up to this appointment? Read How Are Braces Put On? for the full bonding appointment breakdown.